How to add your container images to ArtifactHub
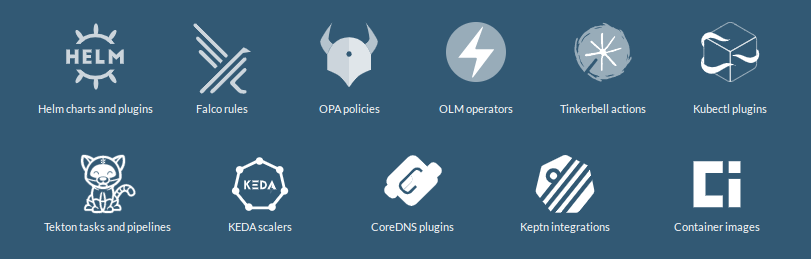
Do you know ArtifactHub? If not, go check it out, it’s a very cool site, holding over 8000 kubernetes packages. I mostly use the site for lurking around and find Helm charts. What I did not know, is that ArtifactHub supports way more packages then only Helm Charts:
- Falco Rules
- OPA policies
- OLM operators
- Container Images
- and more!
So that brought me to the idea to add my container images, which I host on ghcr.io. But why do that?
The images are then searchable on ArtifactHub, but the one other cool feature is: you get a security report of your container image for free.
As an example, this very site, is running in a container. And I added the container image to ArtifactHub, which tells me now, I got a vulnerability on it:
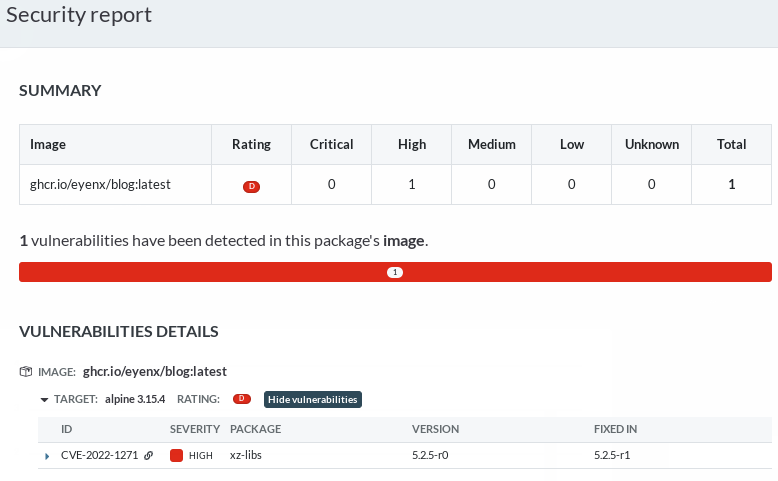
This is very useful, right?
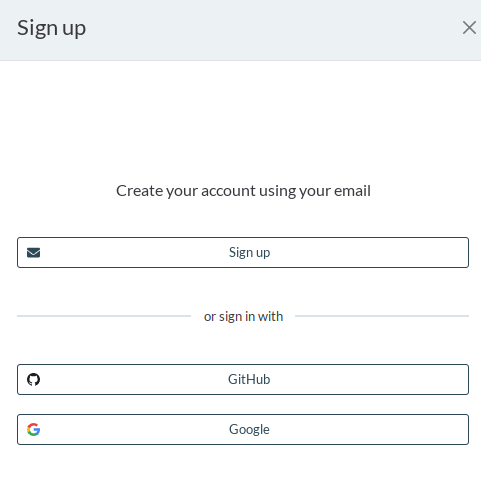
But how do you add your container images to ArtifactHub? Well first of all, create an account there. You can directly register with GitHub or Google, or use your email for registration:
Now you need to follow their instructions on how to label your container images properly so they can be shown on their site.
They support a whole lot of the opencontainers labels, but for starters these 3 labels are required for your image to even appear there.
io.artifacthub.package.readme-urlurl of the readme file (in markdown format) for this package version. Please make sure it points to a raw markdown document, not HTMLorg.opencontainers.image.createddate and time on which the image was built (RFC3339)org.opencontainers.image.descriptiona short description of the package
But as you are already adding labels to your images, please take the time and add the ones listed in the image-spec.
I set those labels in my CI/CD pipeline. And as all of my public repos are hosted on GitHub I end up doing this with GitHub Actions
Here is the action I’m using for setting the labels on my blog container image:
   - name: Build and push
        id: docker_build
        uses: docker/build-push-action@v2
        with:
          context: ./
          file: ./Dockerfile
          push: $
          tags: $
          labels: |
            io.artifacthub.package.readme-url=https://raw.githubusercontent.com/$/$/README.md
            org.opencontainers.image.title=$
            org.opencontainers.image.description=$
            org.opencontainers.image.url=$
            org.opencontainers.image.source=$
            org.opencontainers.image.version=$
            org.opencontainers.image.created=$
            org.opencontainers.image.revision=$
            org.opencontainers.image.licenses=$
As you can see, I’m having a hard time creating the readme-url dynamically. I’ve not found a better solution yet.
For some standalone golang applications you might be using goreleaser. For such cases you can use this configuration for adding the right labels:
dockers:
  - image_templates:
      - "ghcr.io/eyenx/gursht:"
      - "ghcr.io/eyenx/gursht:v"
      - "ghcr.io/eyenx/gursht:v."
      - "ghcr.io/eyenx/gursht:latest"
    build_flag_templates:
      - "--label=io.artifacthub.package.readme-url=https://raw.githubusercontent.com/eyenx//main/README.md"
      - "--label=org.opencontainers.image.created="
      - "--label=org.opencontainers.image.name="
      - "--label=org.opencontainers.image.revision="
      - "--label=org.opencontainers.image.version="
      - "--label=org.opencontainers.image.source="
After you’ve done that, and your image was built, you need to manually add it once on ArtifactHub.
On the control panel you can add a repository. Chose “Container images” as a kind and fill out the form:
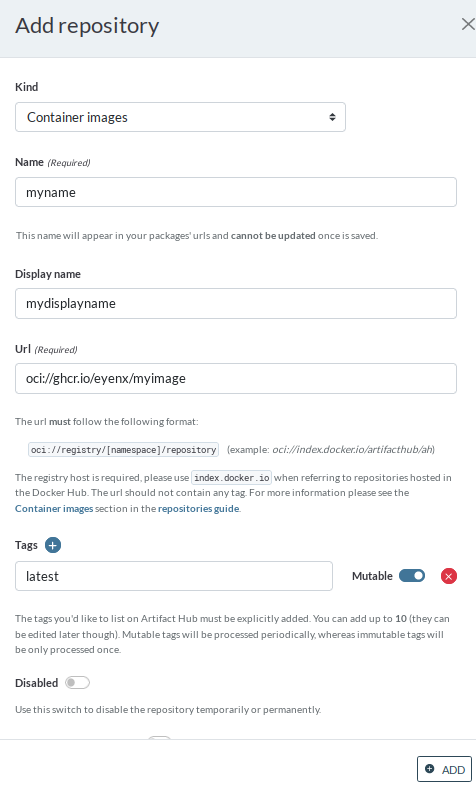
The image will be then listed in the control panel, and you’ll see any errors that might happen while checking it. Usually it takes up to 30 minutes to have the first import and security scan happening.
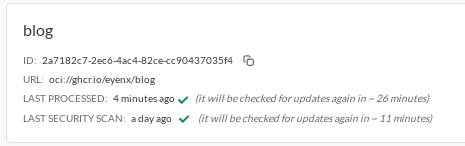
With the three dots menu of the image you are also able to copy a badge you could add on the README of your repository, as I did for eyenx/blog.

In the next few weeks I’m planning to add all my container images on ArtifactHub, so that I’ve got the security scanning covered without having to host any scanning tooling myself!
You can see my progress by searching directly on ArtifactHub for eyenx.